
A FEW WORDS ON…… Making panoramic images
As some of you may know, shooting panorama’s is something of a speciality for me - they’re often the biggest selling images in my gallery in Keswick. Here’s some of the pro’s and con’s of shooting panoramic images and a few tips to help you on the way….

Making panoramic images is a bit of a niche area. I wouldn’t say it’s particularly difficult in terms of the technical aspects, though there are few basics to nail down:
First rule - put the camera in vertical format and level the tripod legs. It’s critical that when sweeping the camera it’s done so around a central point, this gives the software the easiest task of stitching the frames together. If each frame is sloping, the whole pano will slope and be almost impossible to properly correct. A bowl head / levelling plate attachment for your tripod here can be a big advantage as trying to level the legs of the tripod can become cumbersome especially if time pressured. These tools allow you to put the legs down at any angle then level the head independently.
Use an L-bracket if possible, for the reason that if you shoot vertically and have the head tipped over 90 degrees, the camera is not pivoting around a central point (it’s off-centre) and can cause issues with parallax.
Shoot each frame with about 30-40% overlap. Again, this will give the software the best chance to correctly stitch the frames together.
Consider your focal length - the wider your focal length, the more distortion and correction is introduced to the software for it to fix (and also defeats the point of shooting a pano in the first place). As a guide, I’ll rarely shoot individual frames in a panorama wider than 35mm, with the sweet spot being around 50-85mm depending on how vast the scene is. Also remember, the more you zoom in, the more frames needed to capture the wider scene. What we’re trying to achieve is something similar to the perspective of the human eye, not the somewhat stretched/distorted perspective a wide angle lens gives.
Assess the scene in front of you, critically. Like any other good composition, a panorama needs balance, and a good focal point. It’s all too easy to fall into the trap of shooting a panorama with your brain switched off because you’ve so many more megapixels to crop and reframe. Yes, you do have a degree of flexibility, but the cornerstones of a good image don’t change whether you’re shooting a single frame or one made up of 20 individual ones.
Consider the top and bottom of the frames. As a rule you should always overshoot panoramas in terms of the number of frames captured in width, but also allow yourself enough headroom at the top and bottom that your composition doesn’t end up too tight.
If possible, avoid panorama’s with foregrounds. For the simple reason that if you’re shooting frames at 40mm+, you’re inevitably going to run into depth of field issues past a certain point. You can use things like hyperfocal distances though it starts to become quite fiddly and ultimately a compromise somewhere. Also, if you’re shooting a panorama with an extensive foreground, it’s likely it’ll be at a focal length which in the end looks similar to what a single frame wide-angle shot would produce, just with more megapixels and way more time-wasted.
One of the major pro’s for shooting panoramas is they have huge impact when printed big. There’s a reason they sell so well in my gallery, as they fill walls and give a somewhat unique perspective that single frame images perhaps don’t. Another plus is that within the panorama you sometimes can have several other potential images that are useable as you already have the megapixels, so the cropping doesn’t result in any quality loss.
The big negative for shooting them is that for the vast majority of photographers who don’t print, the aspect ratio is poor for social media. Yes they can look great on a big monitor, though for the most part audiences tend to view everything on a phone these days, so the impact is completely lost and is the complete opposite of printing.
EXAMPLES
Below are some examples of panoramas I’ve shot over the years, starting with a recent one and perhaps the most unusual. I’ve mentioned about the sweetspot being about 50-85mm for each frame, well this one is a whopping 40 frames across (then cropped) at 170mm! As I said earlier, longer focal length, more frames. In this scenario I’m shooting towards subjects which are a considerable distance away, hence the large zoom in order to get something which looked impactful. Even at 70/80mm I was getting a lot of sky in the frame and the chevrons of the screes were less impressive, and the pumphouse in the corner almost non-existent. From a technical standpoint, this was the most difficult I’ve taken.
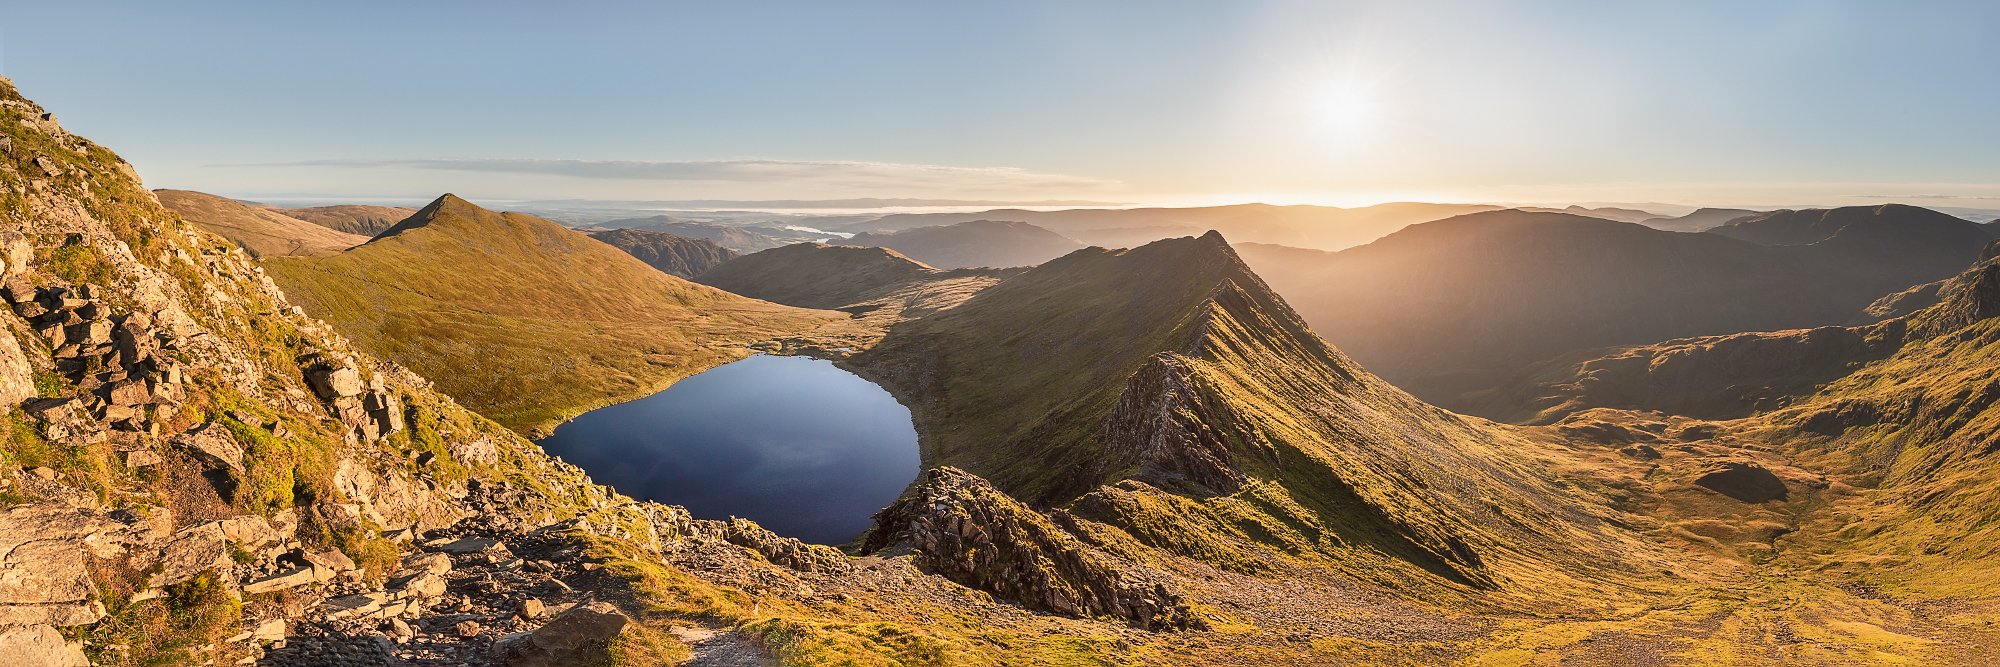
At the opposite end of the scale, the sunrise pano from Striding Edge each frame was actually 18mm, which is very wide and not my norm. But such was the vastness of the scene and also the requirement to have the foreground in the shot meant that this was the only option. So even though I have an ideal approach, it does need to change from time to time even if I don’t want it to!
The last example is a classic 50mm perspective, closest to what the human eye sees and one of the easier images I’ve made.


In summary
Panoramas are relatively simple to shoot with the key basics of a level tripod, overshooting the number of frames and giving them enough overlap. Try to apply the same fundamentals as you would with shooting single frames, then go ahead and try as they’re fun to shoot and make for really impactful large prints!